Seasonal Blimp Migration
The DirecTV blimp returned to Orlando this week and moored in the big empty field at Excutive Airport next to the 408. The blimp and crew are here for a couple of Christmas basketball games, then they're heading on to other cities around Florida and up the east coast.
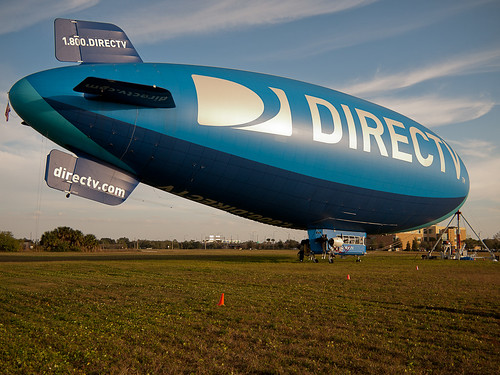
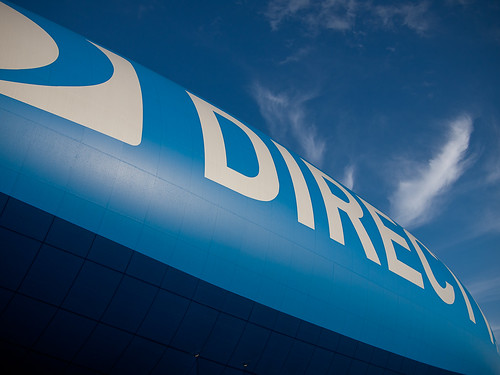
This year the DirecTV's skin had been completely refurbished with all-new decaling over the outer surface. When I last saw this blimp, it's nearly-five-year-old former surface was peeling badly, especially around the bow. This new covering, while using the same basic color scheme, is simpler, with the mid-blue continuously covering both sides and across the dorsal side of the blimp. The ventral is now a solid darker blue, with cyan areas on the lower bow and stern. This is fundamentally a reverse of the earlier color scheme. The cleaner design along with the new livery makes for a handsome looking aircraft.
I was met by Airship Bill again, and it turns out he's actually part of the airport staff. He came out to tell me about how to be safe around the blimp. The winds this afternoon were a bit brisk and there was a bit more movement of the blimp than usual. Even though the blimp is moored at the bow, it's not tied down anywhere else. Anyone around the blimp, such as noisy photographers or mechanics, need to be aware of the big ships movements and either get out of the way (like me) or else pay attention and walk back and forth with the blimp as it moves (like the mechanics).
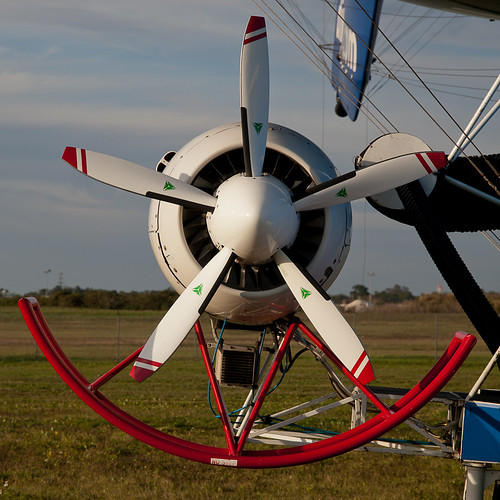
I learned a bit more about this particular aircraft today. The engines are Lycoming piston engines (what type I didn't ask, sorry), one mounted on both the port and starboard sides. In order to make sure that enough air flows back and across the engine for cooling, there's a special ducted fan attached to the shaft, right behind the prop and sitting inside the cowling. This blows sufficient air back into and across the engine for proper operation.
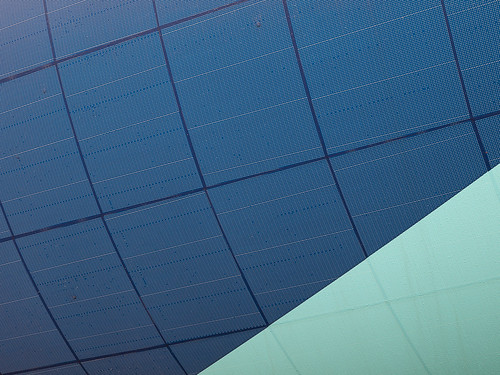
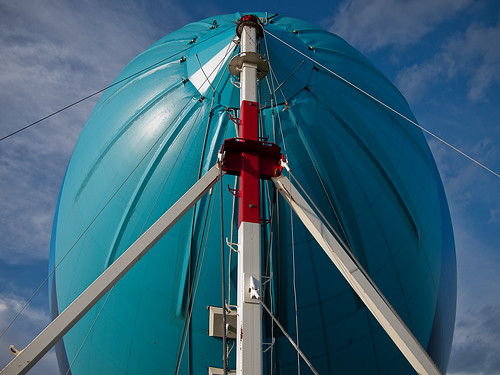
The decals that form the livery on the blimp are sized and cut such that they'll fit across the inflated skin of the blimp. They're attached by strips of adhesive on the edges. The decal sections are solid pieces, but are created with innumerable holes spaced regularly across the entire surface. This allows the decal to expand and contract along with the blimp without undue ripping or tearing.

For the rigging, the surface attachment points are epoxied onto the surface of the blimp, then the decals are applied to help them blend into the overall surface, especially from a distance.

And this is what the DirecTV blimp looked like this past January 2011. You'll notice the difference in coloration, and the extensive flaking around the moor point and back across the dorsal spine.
I love these type of aircraft. They move sedately and effortlessly across the sky, at a pace that's more human scale than any powered aircraft.
Technical
The majority of these were taken with the Olympus E-P2 and the Panasonic 20mm. Two were taken with the Olympus E-3 and the Zuiko 12-60mm. You can of course cheat and click on them to find out which is which. But what I find in looking at all of these together is how the E-P2 with the Panasonic matches the E-3 with the 12-60mm, at least at 20mm focal length.
I've read more than my share of editorializing where the mirrorless cameras aren't good enough to take the place of DSLRs, and I can certainly see the need for continuing to use mine under a number of circumstances. But when I look at the color and general image quality comeing out of both bodies with their respective lenses, I can also see where, under the right conditions and executing at a reasonable pace, that an E-P2 is much preferred over either the E-1 or the E-3 that I have. And that also includes any other manufacturers DSLR.
One more observation: the crew around the blimp were far more at ease with me when I used the E-P2 than when I used the E-3 + 12-60mm. This isn't the first time I've noticed this. I've been able to "sneak" more photos with the E-P2 than with either the E-1 or the E-3. Most folks don't pay mirrorless cameras like the E-P2 much mind, especially those in security (I'm thinking of the Universal concerts I attended earlier this year).
Finally, somewhat paradoxically, using the E-P2 with the 20mm made me long a bit for the Fuji X100. After all, they both have the same equivalent focal lengths (Olympus 40mm vs Fuji 35mm), they both have 12MP sensors, and they're both built with the same general retro shape. But the Fuji lens and larger APS-C sensor combination are well renowned, and if I'm to believe what I read and see, the Fuji stands head and shoulders above the E-P2 plus Panasonic 20mm as far as image quality is concerned. And that's considering that the E-P2 is no slouch. The only thing that stops me running out and buying one is the $1,200 price tag and the long reports about ergonomic and firmware issues.
My technical skills have improved a bit over the last 12 months as well as my discrimination, and I've begun to grow tired of some of the Olympus' sensor limitations. The rigging shot above has a blown highlight (the sun reflection on the skin of the blimp) which truly annoys me. I'm beginning to get tired of blown highlights. I've learned to carefully compose in order to avoid such problems most of the time, but there are times I can't, or won't, because of what I'm trying to photograph. It's the one key issue I have with the Olympus sensor and the one thing I'd wish they'd truly fix, and that's expanded dynamic range, especially when trying to pull detail out of highlights.
Oh well. Nothing to get my knickers knotted over.


Comments
Post a Comment
All comments are checked. Comment SPAM will be blocked and deleted.