openSUSE 10.3 RC1: Advanced Software Installation
I commented in the earlier post about Java 5 being installed instead of Java 6. Turns out I should have clicked the Advanced Mode check box at the bottom of the Software Installation dialog.
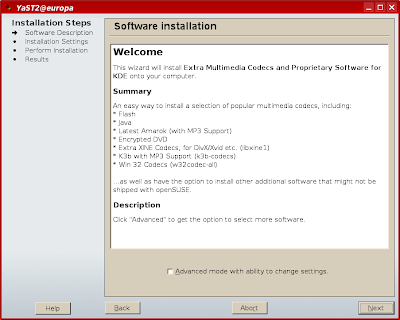 Look down at the very bottom and click 'Advanced mode.' Then click 'Next'.
 You want all the repositories listed, so just leave the alone and click 'Next'.
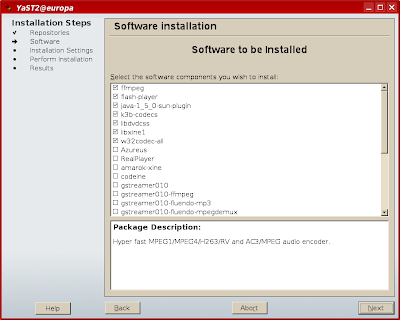 Since I've already run this once, I don't need all the applications checked. For this next run of the tool I will uncheck them all. If this is the first time you've run this then leave them alone and go to the next step.
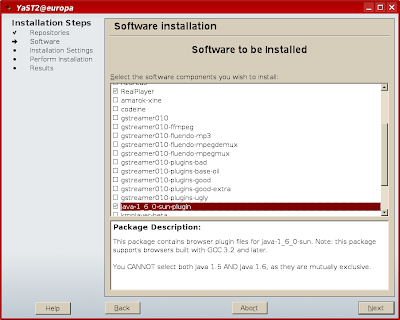 As you scroll down you'll see more applications you can install. I only want the two checked, in RealPlayer 10 and Java 6.
 We've seen this before, so just click 'Next'.
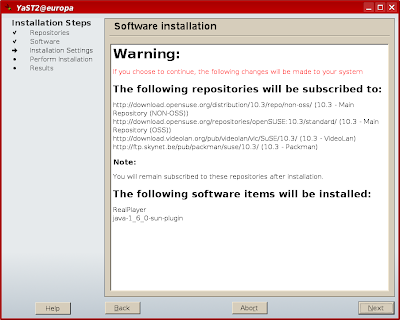
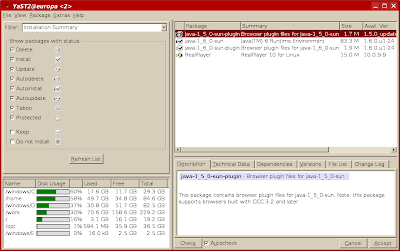 It's at this point that YaST really begins to show some sophistication. First of all YaST checks to make sure that all dependencies are met. In this example, because I'd already installed Java 5 I needed to uninstall it before installing Java 6. One dialog not captured was a resolution dialog asking me if I wanted to also remove non-OSS Java. Since that was the only dependency on that dialog I said yes and told it to try again. I was then presented with the more sophisticated YaST software management screen, in which Java 5 was going to be removed and Java 6 installed in its place.
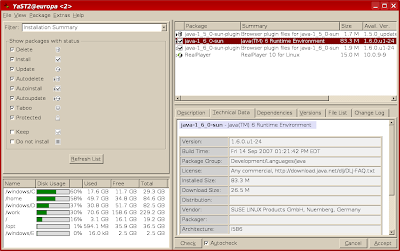 While in software management tool I checked the version number for Java 6. It is 1.6.0 update 1. I then clicked 'Accep'. Later, I went back in and installed the Java 6 development kit and ant 1.7.0. This closes one of my earlier complaints about Java versions. Now on to other issues.
 Look down at the very bottom and click 'Advanced mode.' Then click 'Next'.
 You want all the repositories listed, so just leave the alone and click 'Next'.
 Since I've already run this once, I don't need all the applications checked. For this next run of the tool I will uncheck them all. If this is the first time you've run this then leave them alone and go to the next step.
 As you scroll down you'll see more applications you can install. I only want the two checked, in RealPlayer 10 and Java 6.
 We've seen this before, so just click 'Next'.
 It's at this point that YaST really begins to show some sophistication. First of all YaST checks to make sure that all dependencies are met. In this example, because I'd already installed Java 5 I needed to uninstall it before installing Java 6. One dialog not captured was a resolution dialog asking me if I wanted to also remove non-OSS Java. Since that was the only dependency on that dialog I said yes and told it to try again. I was then presented with the more sophisticated YaST software management screen, in which Java 5 was going to be removed and Java 6 installed in its place.
 While in software management tool I checked the version number for Java 6. It is 1.6.0 update 1. I then clicked 'Accep'. Later, I went back in and installed the Java 6 development kit and ant 1.7.0. This closes one of my earlier complaints about Java versions. Now on to other issues.


Comments
Post a Comment
All comments are checked. Comment SPAM will be blocked and deleted.