NetBeans 6 Beta 1 nano review
 NetBeans 6 Beta 1 was finally released today. I've been anticipating this for some time. I was able to grab a copy and give it a spin, first on Windows SP SP2 and then on Linux. The test machine was my Gateway M685 Core Duo notebook. What follows are a quick set of 'unboxing' screen shots as I install NetBeans 6, load an existing project, add a new repository, and then create a new project based on the new repository.
NetBeans 6 has a nice, professional looking installer that allows you to easily pick the various features you want from a single installation package. If you've been working with NetBeans 6 since about Milestone 9, then you'll know what I'm talking about. For this very simplistic evaluation I installed the Base IDE, Java SE, Web & Java EE, UML, Ruby and C/C++. What I didn't install were the Mobility tools, SOA, GlassFish V2, and Open ESB V2 Preview 3. I may add them later as the installer allows you to add them after the initial installation.
This is what the IDE looks like when it's fired up for the first time. Somebody has taken some trouble to smooth down the 'geek' graphics and make it look a little more polished. Drastic changes took place on the Start page. One immediate complaint I have is that the text is too small and the large text is too light. The overall design is certainly nicer than before but it could stand a few tweaks.
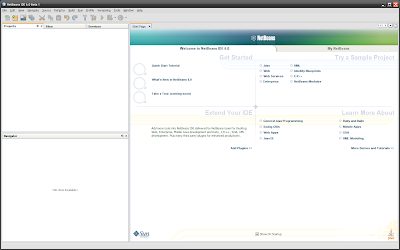 The Start page is subdivided into a Welcome page and a 'My NetBeans' page. The 'My NetBeans' page contains the 'News and Tutorials' and 'Blogs' sections that were introduced with the older NetBeans 5.x series. What's been added is a section at the upper left for currently used projects. I haven't worked enough yet to know the why of what goes there.
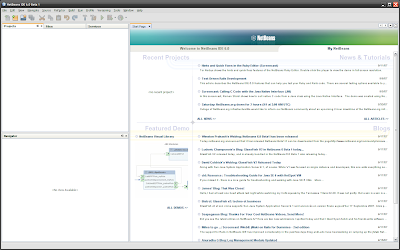
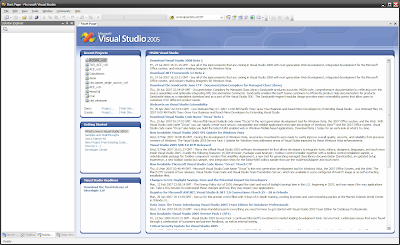
It's interesting is that the 'My NetBeans' page looks a lot like the opening page for Visual Studio 2005 (see below).
The first thing I do when I install a new version of NetBeans is test it by opening up an older project. Older can mean a project created with an older release (such as 5.5.1) or an older build (such as Milestone 10). In this case I loaded an old warhorse of a project that I've carted along since I created it during the NetBeans 5 beta series, Roumen's old demo form.
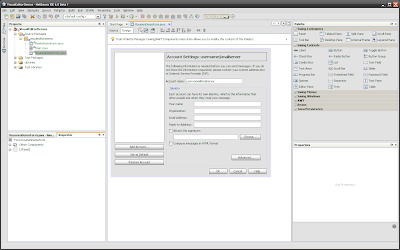 I found, to my satisfaction, that Beta 1 loaded this particular form without any trouble as well as additional, more complex projects. Note how I've also tweaked the interface, adding additional controls as well as making them small, and collapsed the File and Services views off to the left.
The next step was to tweak more of the IDE's look and feel. The Options dialog has changed between NetBeans 5.x and NetBeans 6. To me, the information seems richer and better organized.
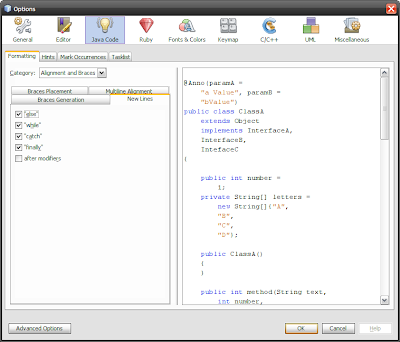
Just as NetBeans 5.x followed the layout from Firefox 1.5, NetBeans 6's Option dialog (above) borrows its design from Firefox 2's Options layout (below). If imitation is the sincerest form of flattery, I wonder if the Firefox crew feel flattered?
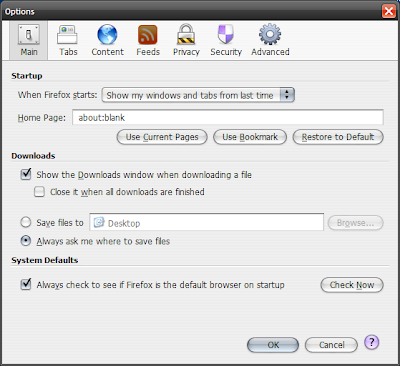
I have one complaint about the Option dialog. If you want to turn on line numbers in the editor, you still have to go into Advanced mode, find the Editor section, and click the line numbering checkbox (below). Please guys, put all the Advanced Editor features on the main Editor tab. These features are actually fundamental to editing.
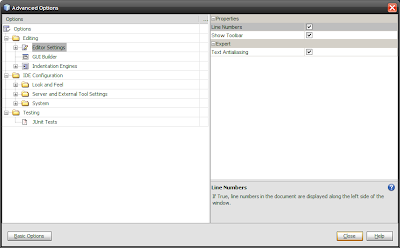
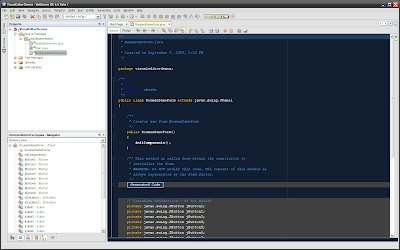
Once done, my IDE is a little closer to how I want it to look and operate. The color scheme chosen is close to my all-time favorite editing color scheme that I first used in Brief, and later, when Borland purchased Brief, in Borland's C++ IDE. This is from the 1989-1993 time period when I was enjoying C++ development on early versions of Windows.
The next task I performed was to install the NetBeans OpenGL Pack. If you haven't checked it out then you should. Installing the modules necessary to develop OpenGL-based applications is an easy two-step process. Step one: Go to the site, scroll down to the bottom of the page and click the first link in the Download section. You're presented with a file to download named net-java-nboglpack-updatecenter.nbm. This NetBeans Module contains the links necessary to add the OpenGL Pack's repository links. Download and save this file and install it with the Plugins Dialog.
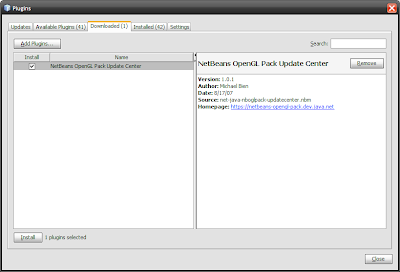
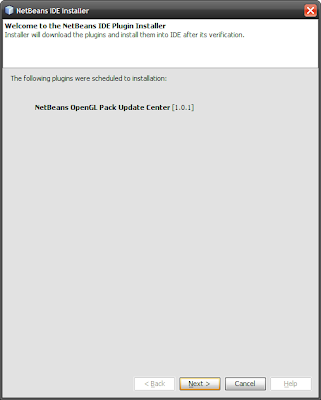
Step two: bring up the Plugins Dialog (above) click on the Downloaded tab, then click on the Add Plugins button. Navigate to where you stored the downloaded NetBeans Module and select it. That action will add a new entry on the Downloaded tab. Select (click) the check box, then click the Install button. You'll be led step-by-step through a series of dialogs that will install the repository, but not the modules.
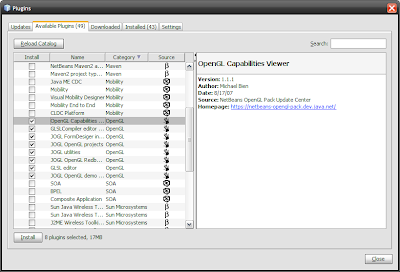
Now we go back to the Available Plugins and click the Reload Catalog button. When that's finished click the Category column head to sort by Category, and then scroll down to the modules marked OpenGL. Select them all to install the pack.
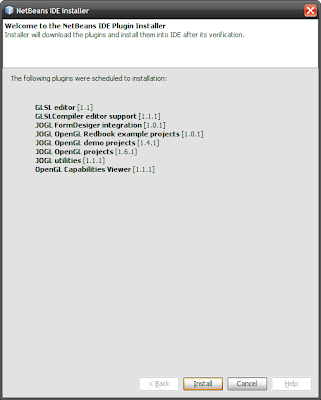
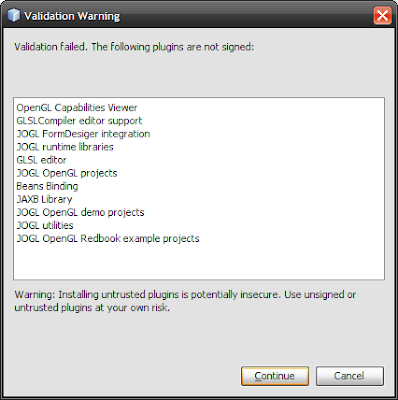
You'll get a Validation Warning about the modules. Don't Panic. Click Continue.
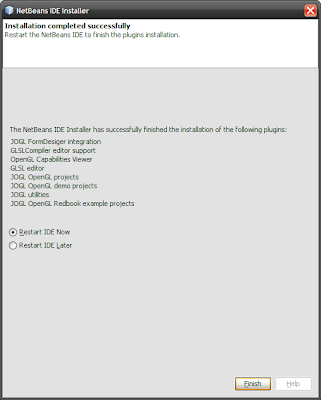
Yes, you want to restart the IDE.
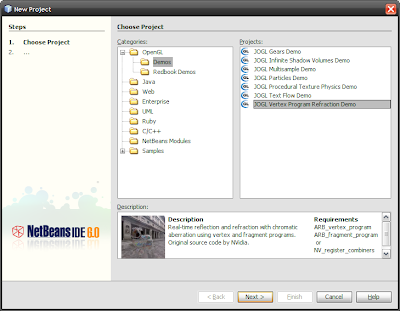
Once you've restarted the IDE create a new OpenGL demo project. You can see which one I selected below. Go through the necessary steps to create it, then build it, then run it. One minor observation; a horizontal split-pane to hold the Description at the bottom and the Categories/Projects at the top. It would be nice to adjust the Description, which I attempted to do more than once.
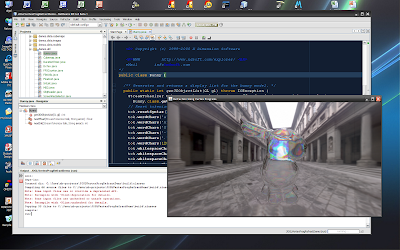
And now I have the mystic glass bunny running on my laptop under Windows. From here you can begin to hack the project, morphing it into an application that is limited only by imagination and ability.
NetBeans 6 makes it dead simple to create many different types of projects, from bare beginnings to fully populated demos using Java, Ruby, or C/C++. From installation to full-up editing, NetBeans 6 is a strong and quite welcome evolutionary advancement over NetBeans 5.5.1, which was certainly no slouch itself. With this release of NetBeans I have completely shaken off my need for Eclipse. My only real complaint is the slow startup speed. I hope that startup performance is addressed in the next betas before a final release in November.
Update
It was pointed out in one of the responses that line numbering can be turned on or off by right-clicking in the editor pane gutter to pull up its sub-menu, and then selecting from there. Which is, of course, absolutely correct. It just goes to show how much trouble an old geek can get into when he doesn't keep up with all the advances and sticks to his Old Ways. And there's no telling how long that feature has been available in NetBeans.
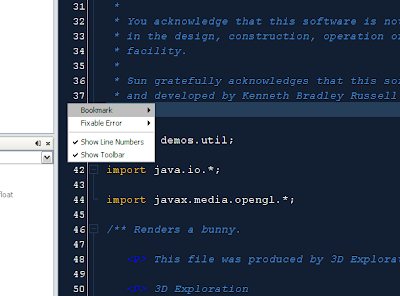

Hi Bill, the line numbers can be turned on in the View menu (View | Show Line Numbers). So you don't have to go to the advanced options dialog. Nice review btw.
ReplyDeleteHi Bill,
ReplyDeleteNice summary, you should consider joining our NetCat program :-).You man already know this, but you can turn on line numbers simply by right-clicking the left gutter in the editor. I've never even thought to look in the options pane for this. /Brian
P.S. Oh, one last thing - Go Noles!
That options dialog style goes back a lot further than Firefox! Earlier versions of Mac OS X had it, and I'm pretty sure it was a NEXTism. I'd look it up, but I'm only getting a trickle of bandwidth right now..
ReplyDeleteNetbeans 6 is slow , very slow. The features are rich but performance is bad . It hangs up for 15-30 seconds irritating. My PC configuration is P4 dual core ,512 RAM, WinXP and Ubuntu 7.04.I used netbeans 5 , 5.5 and are very good in performance .Previously i used JGrasp for programming .The only reason for shifting to Netbeans is Intellisense.NB 6 doesn't make work faster but makes you tired , bored of your work
ReplyDelete>> It hangs up for 15-30 seconds
ReplyDelete>> irritating.
If you're talking about first-time startup then this is true. But then this is a beta.
>> My PC configuration...
I have a 512MB configuration, but it's a single-core Athlon XP 2500+ (1.8GHz), which I'm quite sure is slower than your P4. Yet with Ubuntu 7.04 and Java 6 Update 2 NetBeans 6 performance is still good (ignoring first-time startup).
>> The only reason for shifting to
>> Netbeans is Intellisense.
Intellisense is Microsoft's trademark name for their implementation of autocompletion in their Visual Studio product line. Granted that NetBean 6's autocompletion is quite good, earlier versions had it as well.
>> NB 6 doesn't make work faster
>> but makes you tired, bored of
>> your work.
Wow. I've never had that experience. I'd be kind of curious what kind of project you tried to work on, and what features you installed (or what pack you downloaded and installed). If overall performance is that bad you might also consider writing a bug report or two.
I suggest to try also Codelobster PHP Edition
ReplyDelete