NEX 5N Experimenting with HDR, Panorama...
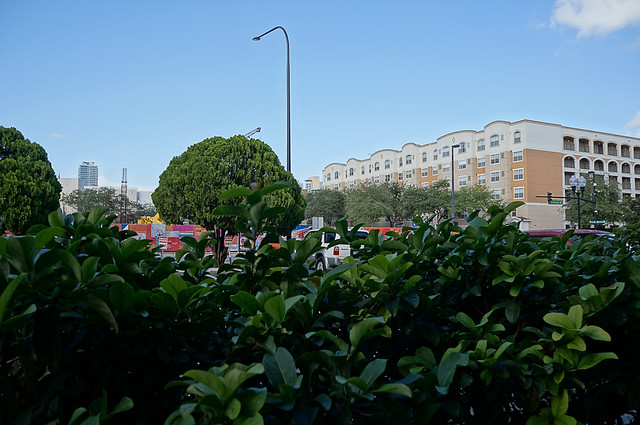 |
| In-camera HDR applied |
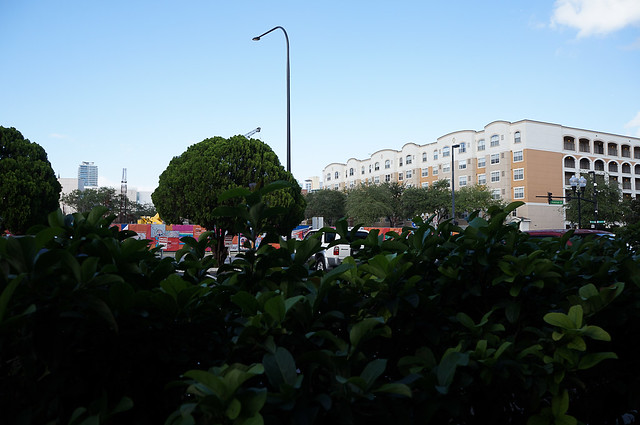 |
| Straight exposure, no HDR applied |
After leaving the hospital I went back into downtown for a little more shutter therapy for me and a bit of experimentation with more of the 5N's built-in features. This time I was playing around with it's in-camera HDR and panorama capabilities.
Based on what I came away with today, Sony's implemented HDR with subtlety in mind. Which is a bit surprising, considering the 5N is aimed at the enthusiast consumer. I had expected the HDR feature to be more garish in nature, but it appears to be implemented with a photographer's eye. The top photo shows what happens after in-camera HDR is applied. Detail in the darkest part of the image (the shadows) is lifted up significantly, but not so that it overwhelms. Note that there are still completely black areas in the lower bushes. The sky towards the horizon has been darkened just a bit to bring out a touch more color and saturation. The cloud in the upper right corner has more texture and detail, and isn't completely white in its center.
 |
| Before HDR applied |
 |
| After HDR applied - note the car in the lower left corner |
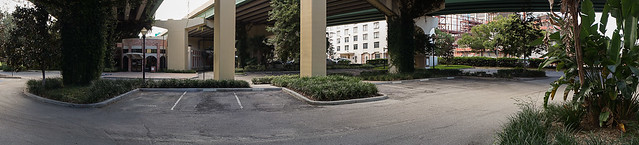 |
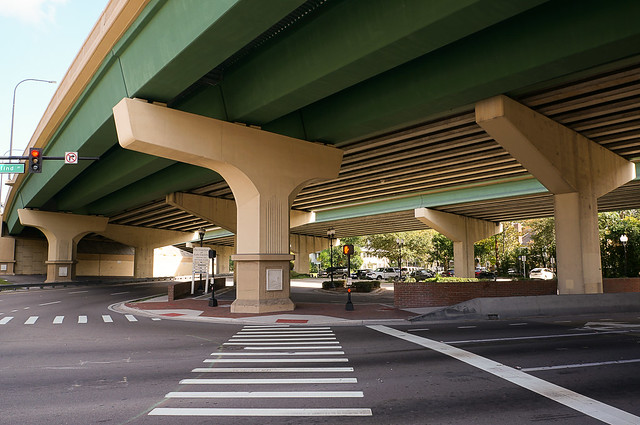
| 408 Panorama |
The camera seemed to do a remarkably good job of stitching the images together which includes correcting for lens aberrations. Verticals are remarkably straight for a hand-held sweep, and the only reason the bridge tops curve is because they do cover a good portion of the scene, and so they must.
There are a number of reasons for using the in-camera features such as HDR and panorama, and they all have to do with collapsing the workflow in post processing. You can buy all sorts of tools to create equivalents using the camera's raw files, then stitching everything together in post. But that makes for a lot of extra effort, especially when what you're after is documentation rather than "art". There's nothing wrong with that kind of art, and there are many magnificent examples done in post. But a lot of us just want to document the scene and move on; we've got too much to do and too little time, or so it always seems.
It should be noted that all of this must be done with JPEG. Selecting Raw output disables all these features. For a little over $400 I'm quite happy to have what I have in the 5N.
It is impressive the amount of computational processing that the 5N is capable of achieving in so small a package. In a small hand-held package I have the ability to perform some rather impressive "post processing" right as the still photo is being taken. Whether it's layering the images for HDR or stitching them together for a panorama, the Sony NEX 5N makes experimentation and documenting the world in the large extremely easy to accomplish.
I think I'm going to try out the 5N's video features next. This should be fun.


Comments
Post a Comment
All comments are checked. Comment SPAM will be blocked and deleted.